Navigating the treacherous canyons and icy highways of the Wasatch Front during the intense storms of January 2026 demands not only caution but also the right equipment. Mastery of how to install snow tire chains is an essential skill that ensures you stay safe and compliant with Utah’s strict traction laws.
Why Winter 2026 Requires Serious Preparation
This year has started with record-breaking precipitation levels across Salt Lake City and the surrounding mountain passes. With the Department of Transportation frequently implementing “Chains Required” alerts on Big and Little Cottonwood Canyons, drivers cannot afford to be unprepared. While modern winter tires are impressive, there are conditions where only snow tire chains provide the necessary bite into the ice to keep your vehicle moving.
Whether you are a local heading up for a powder day or a visitor navigating our winter roads, understanding the mechanics of your traction devices is paramount. Fumbling with cold metal links on the side of a snowy highway is not the time to learn; preparation is key.
Preparation: The “Dry Run”
Before you even leave your garage, you must perform a dry run. Trying to figure out a tangled mess of chains while your fingers are freezing is a recipe for frustration. We recommend laying your chains out on a dry garage floor to inspect them for broken links or rust.
Check Your Clearance
Not all vehicles can accommodate standard chains. Ensure there is enough clearance between your tire and the wheel well, suspension, and brake lines. For vehicles with tight clearance, you may need low-profile cables rather than traditional link chains.
Step-by-Step Guide: How to Install Snow Tire Chains Fast
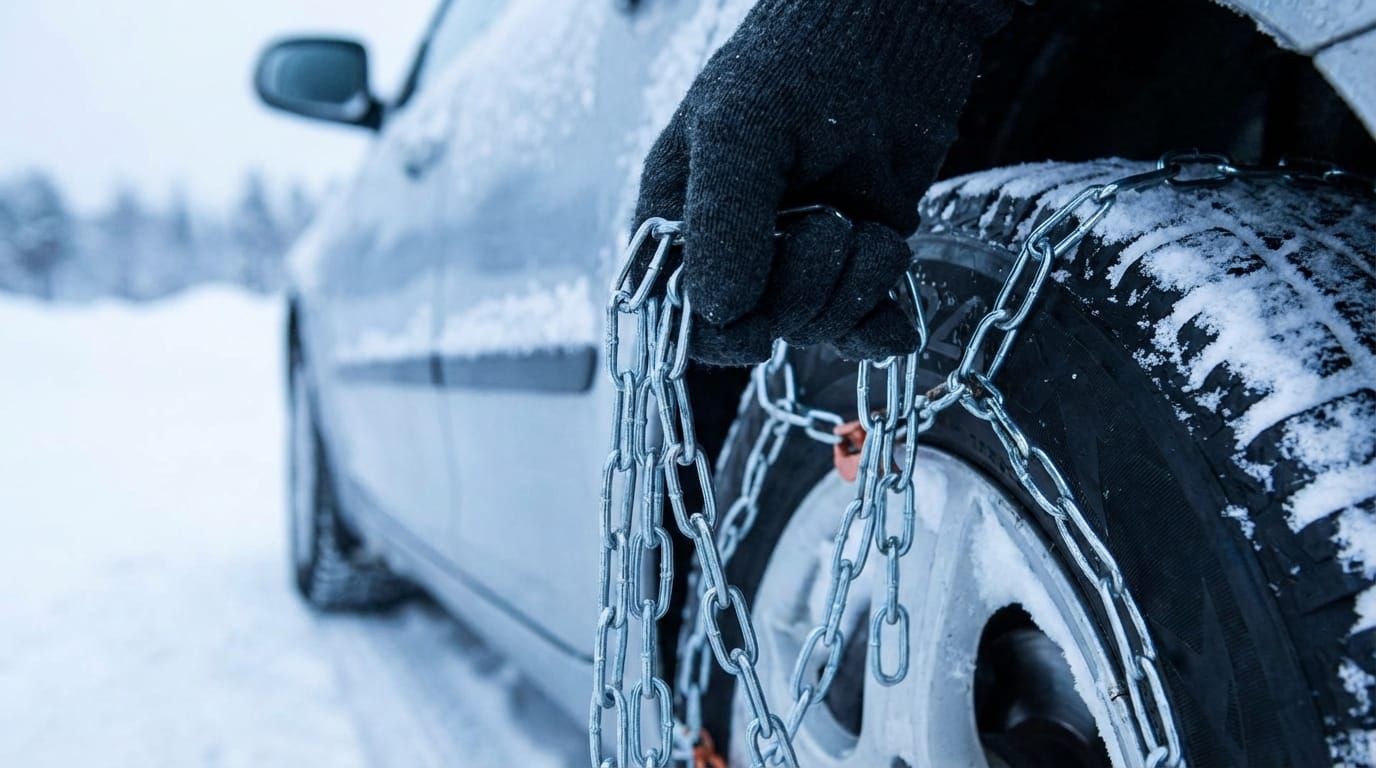
When the snow is falling sideways and traffic is building up, speed and accuracy matter. Follow this streamlined process to get your snow tire chains installed quickly and safely.
- Park Safely: Pull over to a designated chain-up area. If one isn’t available, find a flat spot as far off the roadway as possible. Engage your parking brake immediately.
- Untangle and Lay Out: Hold the chains up to remove any twists. Lay them flat on the ground near the tire you are working on, ensuring the hooks are facing up (or as per manufacturer instructions to avoid tire damage).
- Drape the Chain: Lift the chain and drape it over the top of the tire. Ensure it is centered evenly across the tread. The inner hook should hang down on the inside of the wheel, and the tightening mechanism should be on the outside.
- Connect the Inner Latch: Reach behind the tire (you may need to lay on the ground slightly) and connect the inner hook or fastening mechanism. Do this quickly to minimize exposure to oncoming traffic.
- Connect the Outer Latch: Move to the outside of the tire and connect the outer hook. Adjust the links to make the fit as snug as possible by hand.
- The “Roll and Tighten” Technique: Drive your vehicle forward approximately 15 to 30 feet. Stop again. The chains will have settled into the grooves of the tire, creating slack. Get out and retighten the chains using the tensioners or rubber bungees.
Pro Tip: Always carry a pair of waterproof work gloves and a headlamp in your trunk. Installing chains in the dark with bare, wet hands is near impossible and dangerous.
Chain Types Comparison
Choosing the right traction device affects how fast you can install them. Below is a comparison of the most common types available in 2026.
| Chain Type | Traction Level | Installation Speed | Best Use Case |
|---|---|---|---|
| Diamond Pattern Link Chains | High | Moderate | Heavy snow, steep canyons, icy passes. |
| Cable Chains | Moderate | Fast | Light to moderate snow, vehicles with low clearance. |
| Sock/Textile Devices | Low/Moderate | Very Fast | Emergency use, short distances, flat roads. |
| Automatic Chains | High | Instant | Commercial vehicles, frequent mountain drivers. |
Common Mistakes to Avoid
Even seasoned drivers make errors. Avoid these common pitfalls to protect your vehicle and your snow tire chains:
- Driving too fast: Chains are not designed for speeds over 30 mph. Exceeding this can cause the links to break and damage your wheel wells.
- Installing on the wrong tires: Always install chains on the drive wheels. For 4WD or AWD vehicles, check your owner’s manual—usually, they go on the front or all four, but specific manufacturer recommendations vary.
- Ignoring dry pavement: Driving on bare asphalt with chains destroys both the road and the chains. Remove them as soon as the road clears.
Safety First: Driving with Chains
Once your chains are on, your driving style must change. Accelerate slowly to prevent spinning, which can dig a hole in the snow or snap a chain link. Brake gently and early. The added weight and vibration on your wheels will change how your car handles, so remain hyper-aware of your surroundings.
If you hear a loud banging noise while driving, stop immediately. A broken link flailing against your fender can cause significant body damage or sever a brake line. Secure the loose end or remove the chains entirely if they are damaged beyond use.
When to Call for Help
Sometimes, despite your best efforts, the conditions are simply too severe, or a mechanical issue prevents you from installing your chains safely. If you find yourself stuck in a snowbank, unable to secure your chains, or facing a mechanical failure in freezing temperatures, it is safer to stay in your vehicle and call for professional assistance.
Stay safe on the Utah roads this winter. If you find yourself in a bind or need professional vehicle recovery during a storm, Salt Lake Towing is ready to help you get back on track safely. Call us at (801) 555-0123 or visit our website to learn more about our emergency winter roadside assistance services.